Please note that this is the help section for the former Newsletter2Go software.
How do I change from MailChimp to Newsletter2Go?
We are excited for your decision whether you chose Newsletter2Go and welcome you warmly. To make sure that the change runs smoothly right from the start, we offer you the following step-by-step guide.
Of course, you can always contact our support team at support@newsletter2go.com for further information.
Part 1: Migrate contacts
Step 1: Export data from MailChimp
Log in to your account and open the tab "Audience". If you are using several audience, choose first which one you want to export.
Then open the contact list via "View Contacts" and save the data record via "Export Audience".


When the process is complete, you can open and export the file directly under "Notification" in the top right corner. If you have done the export a long time ago or created several data records, you can get an overview via "Manage contacts"> "Audience exports" and export the files as CSV.

Step 2: Import data in Newsletter2Go
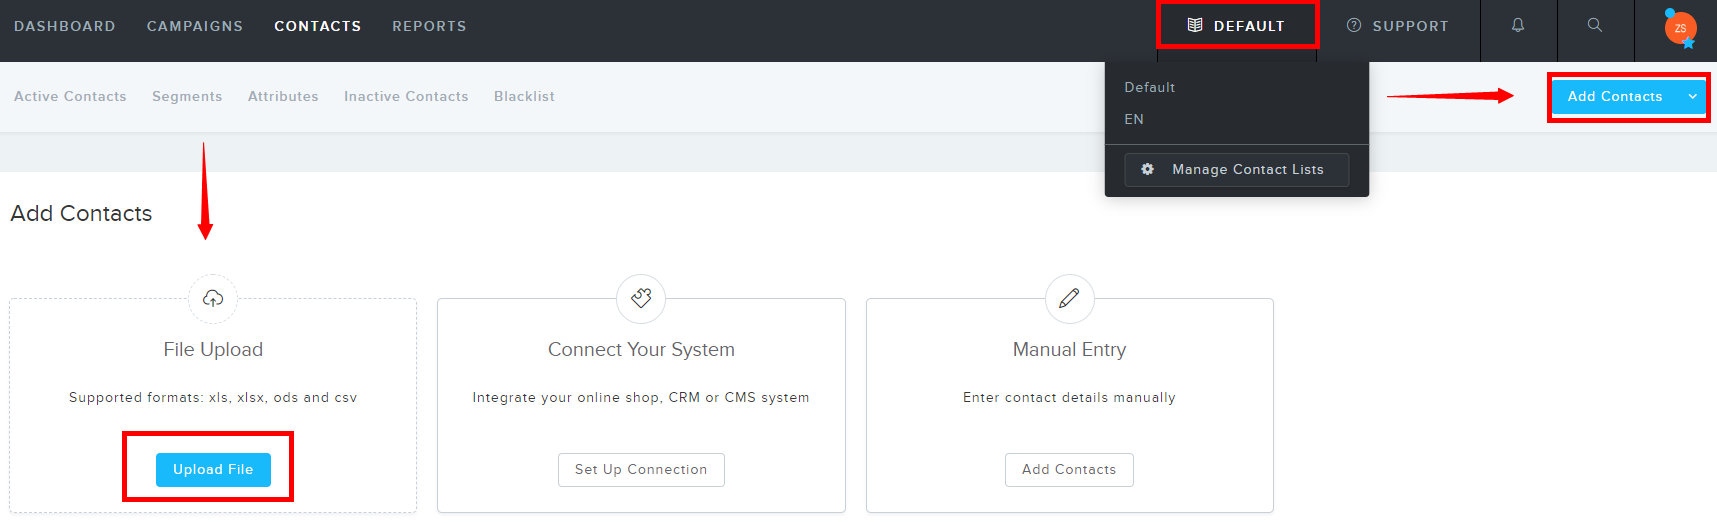
Log in to your Newsletter2Go account. If you're in the standard package, you can use several address books. An "address book" is similar to an "audience" and can be managed seperately. So first select the address book in which the recipients should be imported - as in the example "DEFAULT".
Now go to "Contacts", click "Add Contacts" and upload the CSV. The upload is only valid for the current address book.
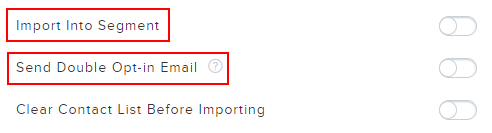
In the step between upload and import you can make further settings:
- You can select for each column whether the value should be imported and which attribute it should be assigned to. If the attribute does not yet exist, you can also create an own new attribute. Here you can find more information on own attributes.
- If you don't have a DOI validation of the contacts yet, you can also directly send a DOI request during the import. More details here.
- Within the address book you can also import the contacts directly into a segment and so f.e. seperate the different imports for a better overview. The segments are only valid per address book. More information about segments click here.

Part 2: Migrate templates
As you may understand, each provider offers a different newsletter tool, using its own elements. Therefore it is not possible to edit or duplicate existing templates with our editor. However, you have in total 3 alternatives to continue to use your old template:
Option 1: Rebuild the template
It takes some time to recreate the existing design with our editor, but afterwards you can save the draft as template. The advantage is that you have a base that you can use again at any time and continue editing with elements of the editor.
How to save a draft as a template is here. Templates can also be used in multiple address books.
Option 2: Import the template as html
In your MailChimp account, you first have to export the desired newsletter as "html" under "Templates".

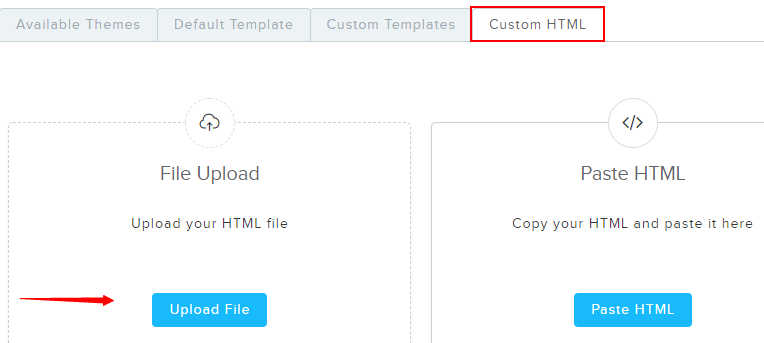
In your Newsletter2Go account you select as template "Custom html" and upload the file. Now you can use the same template as before.
Please note, that template can only be edited as html. You do not have access to the standard elements of the editor if you use html. The draft can also be used only once and not saved as a template.

Option 3: Have the template designed
To make the redesign a little easier for you, you can also book a premium template with us. With a premium template we overtake the programming and design according to your wishes. In addition, the presentation is tested in the popular email clients, both in the desktop, as well as the responsive version.
If you would like more information, you can contact our sales team at sales@newsletter2go.com
Part 3: Migrate Reports
Due to the different technical basis, the statistics of the sent newsletters cannot be transferred to your Newsletter2Go account.
We recommend you nevertheless to export the statistics. In your Newsletter2Go account you can export the reports as PDF or CSV too. IT would be then possible for to compare the statistics externally. More information about the reports can be found here.

Part 4: Have fun with the newsletter!
As an additional tip, we recommend to set up DKIM and Sender ID via "Email Settings". This entries help to improve the delivery rate significantly.
More information about deliverabiltity we offer in our help articles or video tutorials